> ## Documentation Index
> Fetch the complete documentation index at: https://www.oplane.com/docs/llms.txt
> Use this file to discover all available pages before exploring further.
# Oplane MCP server and IDE plugin setup
> Connect Oplane to Cursor, Claude Code, GitHub Copilot CLI, opencode, or Codex via MCP for in-editor threat modeling and security guidance.
Use Oplane directly in your dev environment through the Model Context Protocol (MCP) or the Claude Code plugin. Get security recommendations and threat modeling assistance while you code.
## Getting started
To connect Oplane MCP to your dev environment, visit your Oplane dashboard and follow the setup instructions for your specific environment. The setup process takes just a few minutes.
Once connected, prompt your AI assistant with "Use Oplane" to get started. If you choose to create a new threat model, the entire workflow below runs automatically, from identifying use cases and threats to providing implementation advice and assessing your code.
To use Oplane MCP from a CI pipeline or another tool where nobody signs in, create an [application](/docs/administration/applications) and connect with its API key.
## Supported environments
Oplane works with any environment that supports the Model Context Protocol:
Add the following to your `mcp.json` configuration file:
```json theme={null}
{
"mcpServers": {
"Oplane": {
"url": "https://gravity.oplane.io/mcp/"
}
}
}
```
Connect Oplane MCP directly in Cursor's MCP settings.
[Add Oplane to Cursor →](https://cursor.com/en-US/install-mcp?name=Oplane\&config=eyJ1cmwiOiJodHRwczovL2dyYXZpdHkub3BsYW5lLmlvL21jcC8ifQ==)
Install the Oplane plugin from the marketplace. From inside Claude Code, run:
```bash theme={null}
/plugin marketplace add oplane/oplane-plugin
/plugin install oplane@oplane-plugins
```
After installing, run `/mcp`, select the Oplane server, and authenticate via your browser.
If you prefer not to use the plugin, add Oplane as an MCP server manually:
```bash theme={null}
claude mcp add --transport http oplane https://gravity.oplane.io/mcp/
```
Install the Oplane plugin from a local clone of `oplane/oplane-plugin`:
```bash theme={null}
copilot plugin install /path/to/oplane-plugin
```
Verify the plugin is loaded with `copilot plugin list` (or `/plugin list` in an interactive session). Re-run `copilot plugin install` after pulling plugin updates.
The plugin exposes the `analyze` and `analyze-pr` skills plus the `security-analyzer` subagent, which Copilot CLI can invoke automatically when it needs security analysis. See GitHub's [plugins guide](https://docs.github.com/en/copilot/how-tos/copilot-cli/customize-copilot/plugins-creating) for details on how Copilot CLI loads plugins.
opencode has no plugin marketplace or CLI installer, so setup is manual: copy the skill files and the `security-analyzer` subagent from `oplane/oplane-plugin` into your opencode config directory, then add the Oplane MCP server to `opencode.json`.
Install the `analyze` and `analyze-pr` skills plus the `security-analyzer` subagent (use `.opencode/skills` and `.opencode/agents` in your project root for a per-project install instead of `~/.config/opencode`):
```bash theme={null}
mkdir -p ~/.config/opencode/skills/analyze ~/.config/opencode/skills/analyze-pr ~/.config/opencode/agents
curl -fsSL -o ~/.config/opencode/skills/analyze/SKILL.md \
https://raw.githubusercontent.com/oplane/oplane-plugin/main/opencode/skills/analyze/SKILL.md
curl -fsSL -o ~/.config/opencode/skills/analyze-pr/SKILL.md \
https://raw.githubusercontent.com/oplane/oplane-plugin/main/opencode/skills/analyze-pr/SKILL.md
curl -fsSL -o ~/.config/opencode/agents/security-analyzer.md \
https://raw.githubusercontent.com/oplane/oplane-plugin/main/opencode/agents/security-analyzer.md
```
Add the Oplane MCP server to `~/.config/opencode/opencode.json` (or `opencode.json` in your project root):
```json theme={null}
{
"$schema": "https://opencode.ai/config.json",
"mcp": {
"oplane": {
"type": "remote",
"url": "https://gravity.oplane.io/mcp/",
"enabled": true
}
}
}
```
opencode discovers skills by their description and invokes them via its `skill` tool. There are no slash commands. Ask opencode to analyse the project or a pull request and it loads `analyze` or `analyze-pr` automatically. For a deeper self-directed review it can hand off to the `security-analyzer` subagent, which you can also invoke manually with `@security-analyzer`.
Add the Oplane marketplace from your terminal:
```bash theme={null}
codex plugin marketplace add oplane/oplane-plugin
```
Then start Codex, run `/plugins`, select **oplane**, and install it. Restart your Codex session so the bundled skills and MCP server load.
The Oplane MCP server uses OAuth. Sign in when prompted, or trigger authentication manually:
```bash theme={null}
codex mcp login oplane
```
A browser opens where you log in. Tokens are issued and refreshed automatically.
The plugin bundles the `analyze` and `analyze-pr` skills. Codex discovers skills by their description: ask it to analyse the project for security threats and it loads `analyze`, or point it at a pull request for `analyze-pr`. Codex has no subagent mechanism, so the `security-analyzer` agent is not included.
If you only want the Oplane tools without the bundled skills, add the MCP server directly:
```bash theme={null}
codex mcp add oplane --url https://gravity.oplane.io/mcp/
```
## Recommended setup: CLAUDE.md / AGENTS.md
For the highest-value use of Oplane, your agent should threat-model security-relevant changes *before* you commit or push them, not after a PR comment flags them. To make this a standing habit rather than a reaction, paste the block below into your project's `CLAUDE.md` or `AGENTS.md` (whichever file your agent reads on startup).
Once it's there, your agent sees this instruction on every session. It reaches for Oplane MCP automatically whenever it's about to commit a change that touches authentication, access control, data handling, untrusted input, new endpoints, secrets, or infrastructure.
```text CLAUDE.md / AGENTS.md theme={null}
For changes that could affect security, you MUST threat-model the change using Oplane MCP
before committing. Threat-model the actual diff (e.g. the PR threat model), not a written
summary of it - a model built from your own description only re-tests risks you already
considered. Explicitly consider untrusted-input-inbound (log/audit/template/SQL injection
from external data), not only outward data leakage.
```
Each line is there for a reason. Threat modeling before you commit catches risks while the change is still cheap to fix, rather than after review. Modeling the actual diff matters because a model built from the agent's own description only re-tests risks the agent already thought of, whereas feeding it the real diff (or the PR threat model) surfaces the blind spots. And calling out untrusted-input-inbound nudges the agent toward injection-style risks from external data, such as log, audit, template, and SQL injection, instead of only watching for outward data leakage.
This is the same standing instruction Oplane MCP sends to Claude Code, Cursor, and GitHub Copilot on connect, and the same block embedded in Oplane's PR review comments. Pasting it into `CLAUDE.md` / `AGENTS.md` gives you the same behaviour across every session, including ones that don't start from a PR.
## What you can do
Once connected, tell your AI assistant what you want to do. Here are the workflows available:
| Workflow | Example prompt |
| - | - |
| Guided walkthrough of threat modeling tools and workflows | `Get started with Oplane` |
| Analyse your codebase and suggest what to threat model | `Suggest what to threat model with Oplane` |
| Run a full automated threat modeling workflow end-to-end | `Threat model my authentication changes with Oplane` |
| Threat model a pull request by analysing the diff | `Threat model this PR with Oplane` |
| Get guidance for writing threat model descriptions | `Help me describe my changes for Oplane` |
| Security review of your AI coding agent's permissions and access | `Review my agent setup with Oplane` |
| Analyse recent commits for security-relevant updates | `Analyse my recent changes with Oplane` |
| Analyse changes since a specific commit or tag | `Analyse changes since last release with Oplane` |
## Tool reference
Your AI assistant calls Oplane's MCP tools automatically as part of the workflows above, so you don't need to call them directly. For the full list, see [MCP tools](/docs/reference/mcp-tools).
You can start by asking "Use Oplane to suggest threat modeling scopes" if you're not sure where to begin.
## Choosing a workspace
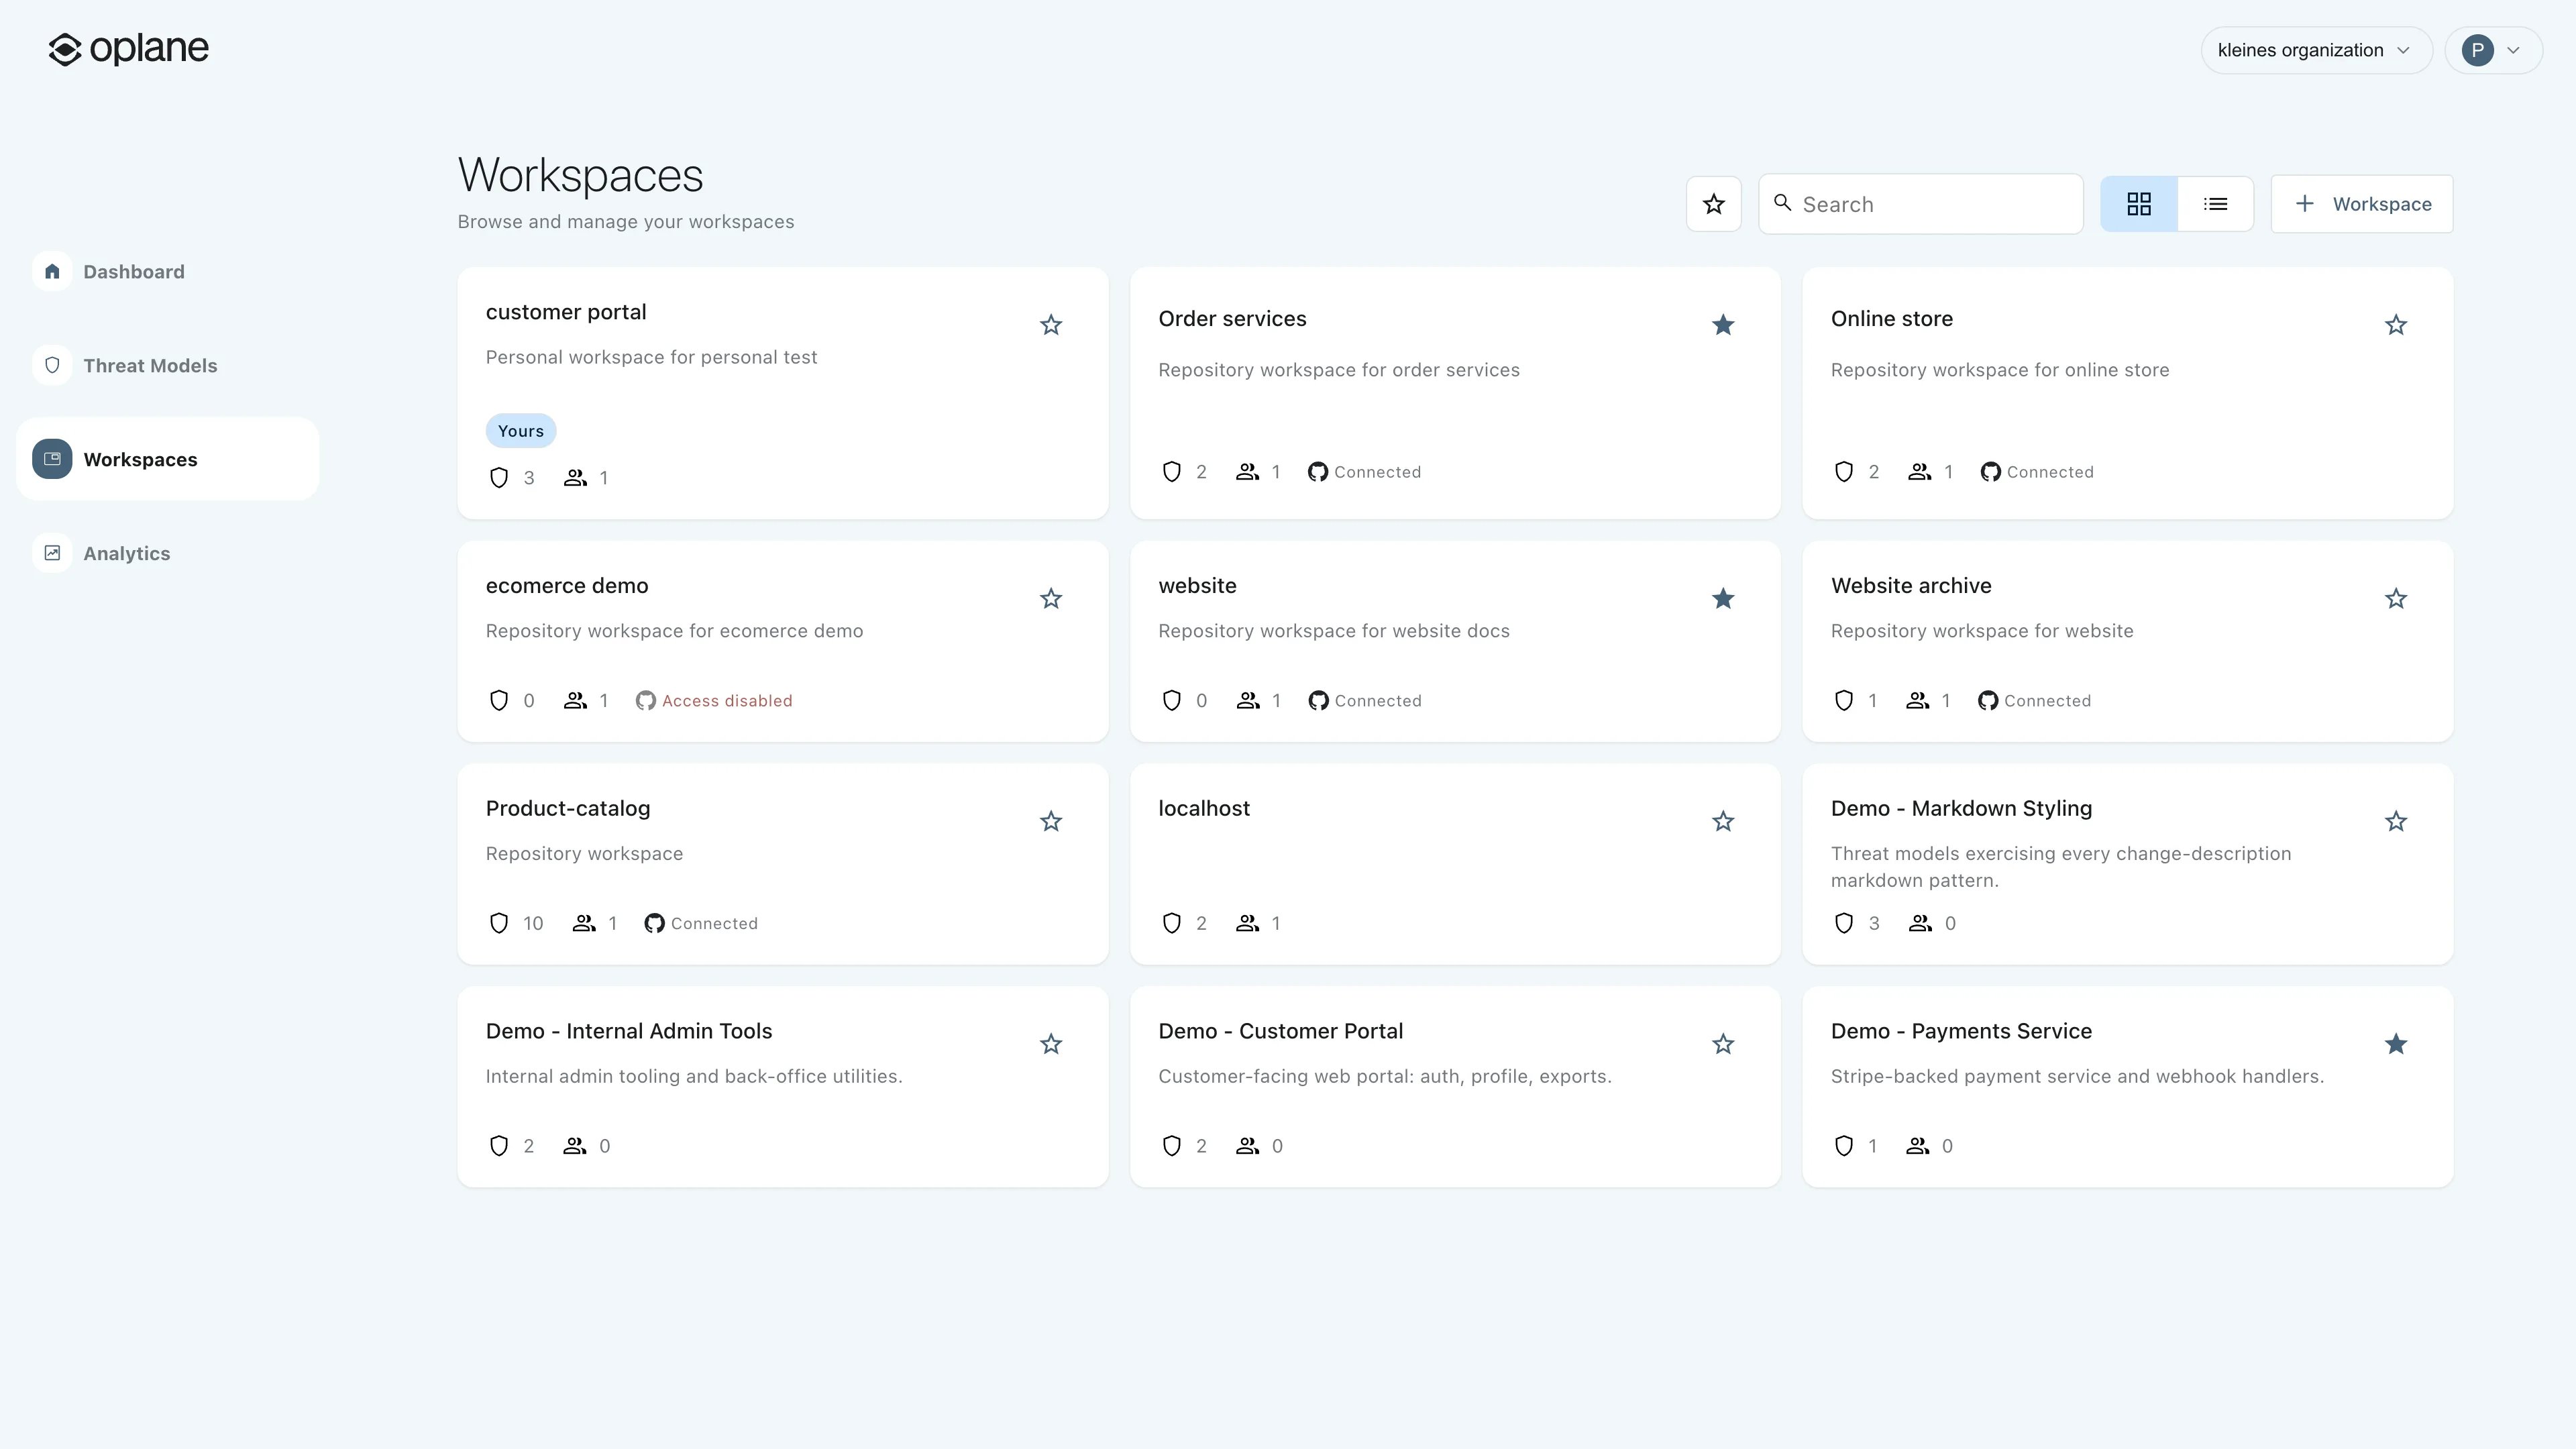
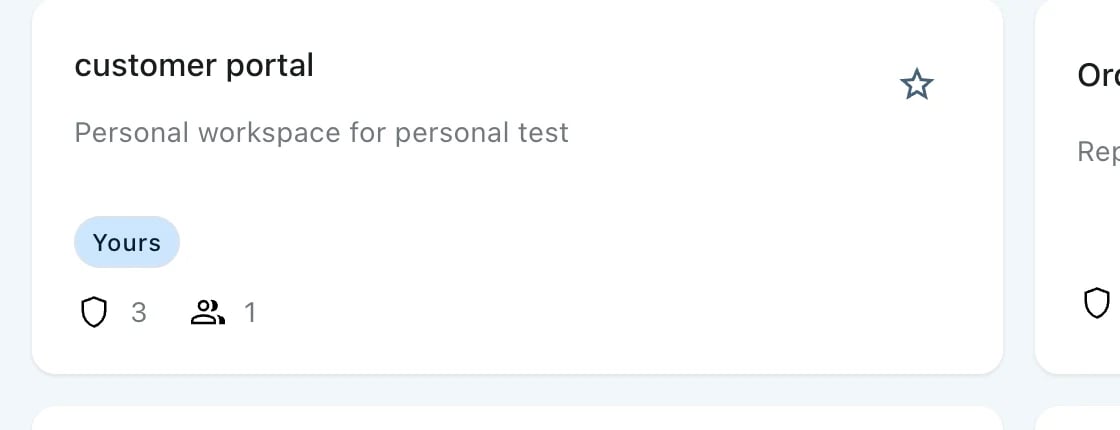
When you create a threat model via MCP, Oplane automatically creates a **personal workspace** for you and adds the threat model there, with no setup required. This is the default, so you can start threat modeling immediately without picking a workspace first.
To target a specific workspace instead, mention it by name in your prompt:
* "Use Oplane to threat model my auth changes in the **workspace name** workspace"
The agent searches your workspaces by name, finds the match, and creates the threat model there. You never need to look up workspace IDs manually.
If you're not sure which workspaces you have, ask "Search my Oplane workspaces" to see a list.
You can find your workspaces in the Oplane dashboard. Your personal workspace is marked with a **Yours** badge.
 Learn how workspaces work and how to create them.
This documentation is built and hosted on [Mintlify](https://mintlify.com), a developer documentation platform.
Learn how workspaces work and how to create them.
This documentation is built and hosted on [Mintlify](https://mintlify.com), a developer documentation platform.